
Resources
How to tie your obi (belt)
Introduction
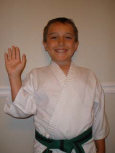
I’m Shane and I wanted to show you the way I tie my Karate Obi (belt). I hope this will help you with tying yours! Let’s begin…
Step 1
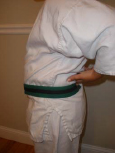
First, place one end on the center of your back.
Step 2
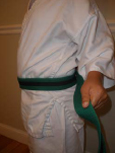
Then, continue to wrap it around your waist…
Step 3
…until you have about a foot of length left.
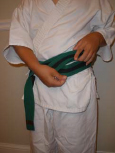
Step 4
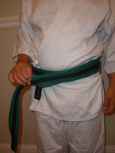
Next, tuck the loose end under all the layers of the wrapped belt…
Step 5
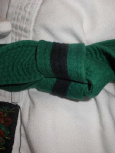
…so that it looks like this.
Step 6
Now, carefully pull the other end (that you originally placed on your back) from underneath the wrap and to the front.
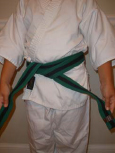
Step 7
Adjust the lengths of the ends until they are equal by rotating the entire belt wrap around your waste.
Step 8
After getting equal lengths, be sure that the belt still looks like this before you start to tie the knot.
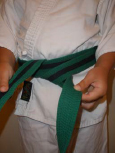
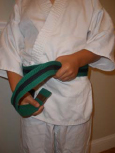
Step 9
Now, to get a neat knot, turn the end that comes from underneath inward one-half turn, then place the other end over it…
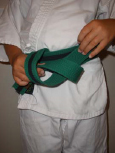
Step 10
…and feed the top end under and up through the loop of the lower end.
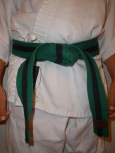
Step 11
Now, pull both ends to get a neat knot. If you pull too hard, the knot may collapse…so take it easy.
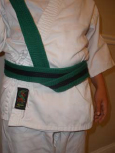
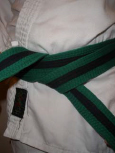
Final 12
The final knot should look like this. It has a nice square look to it. Great job!! If you still are having trouble getting your belt tied, just ask me or one of the other senior students.
Thank You
Thank you for allowing me to share this tradition with you. Good luck in your Karate Training. I’ll see you on the Floor!!!